Mart Tasks
This article describes how to create marts, rebuild the store views, rebuild the store indexes, rescan the custom views, schedule the daily view history job and to view the Custom Views SQL history
Navigate to the Mart Tab
Go to the xMart environment Home page
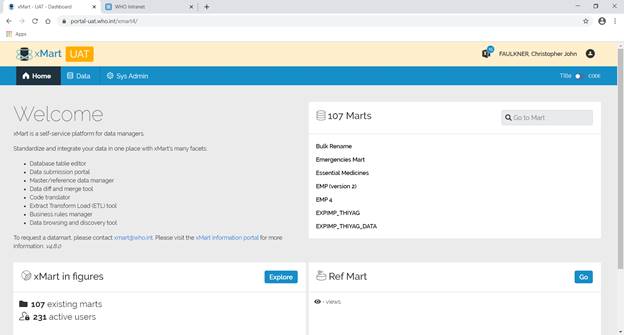
Select SysAdmin from the top menu
Select Marts from the menu underneath
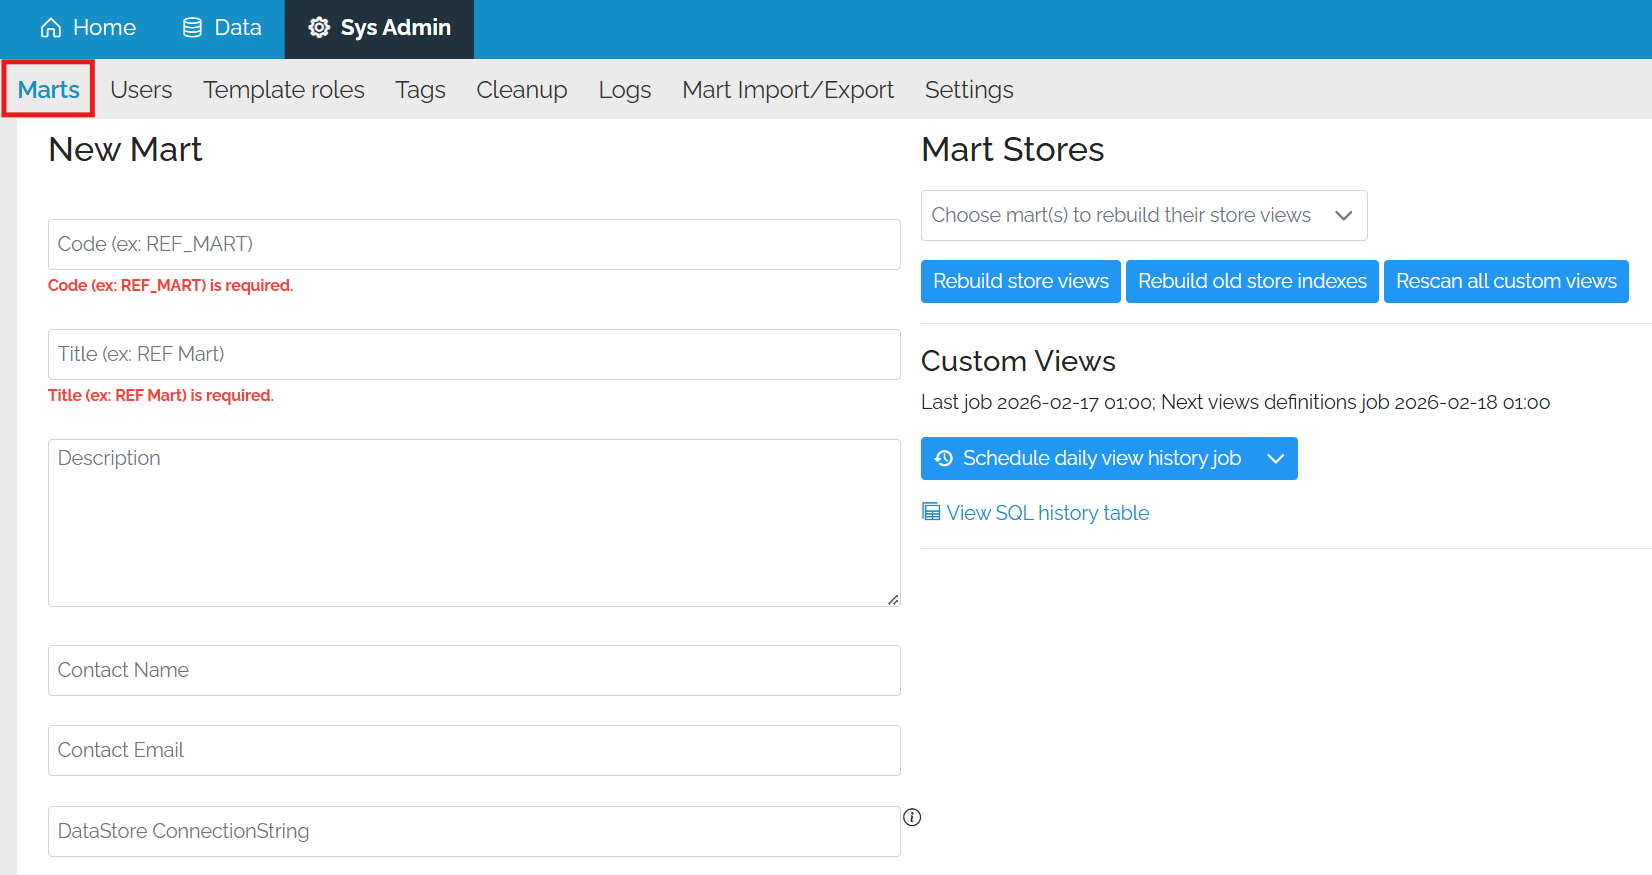
Create a Mart
Basic details
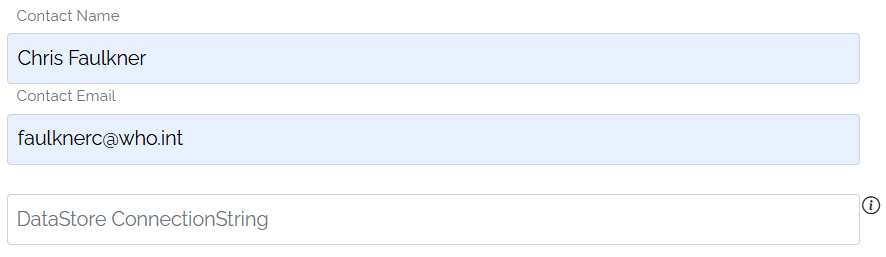
Type in the code, title, contact details and preferably a short description.
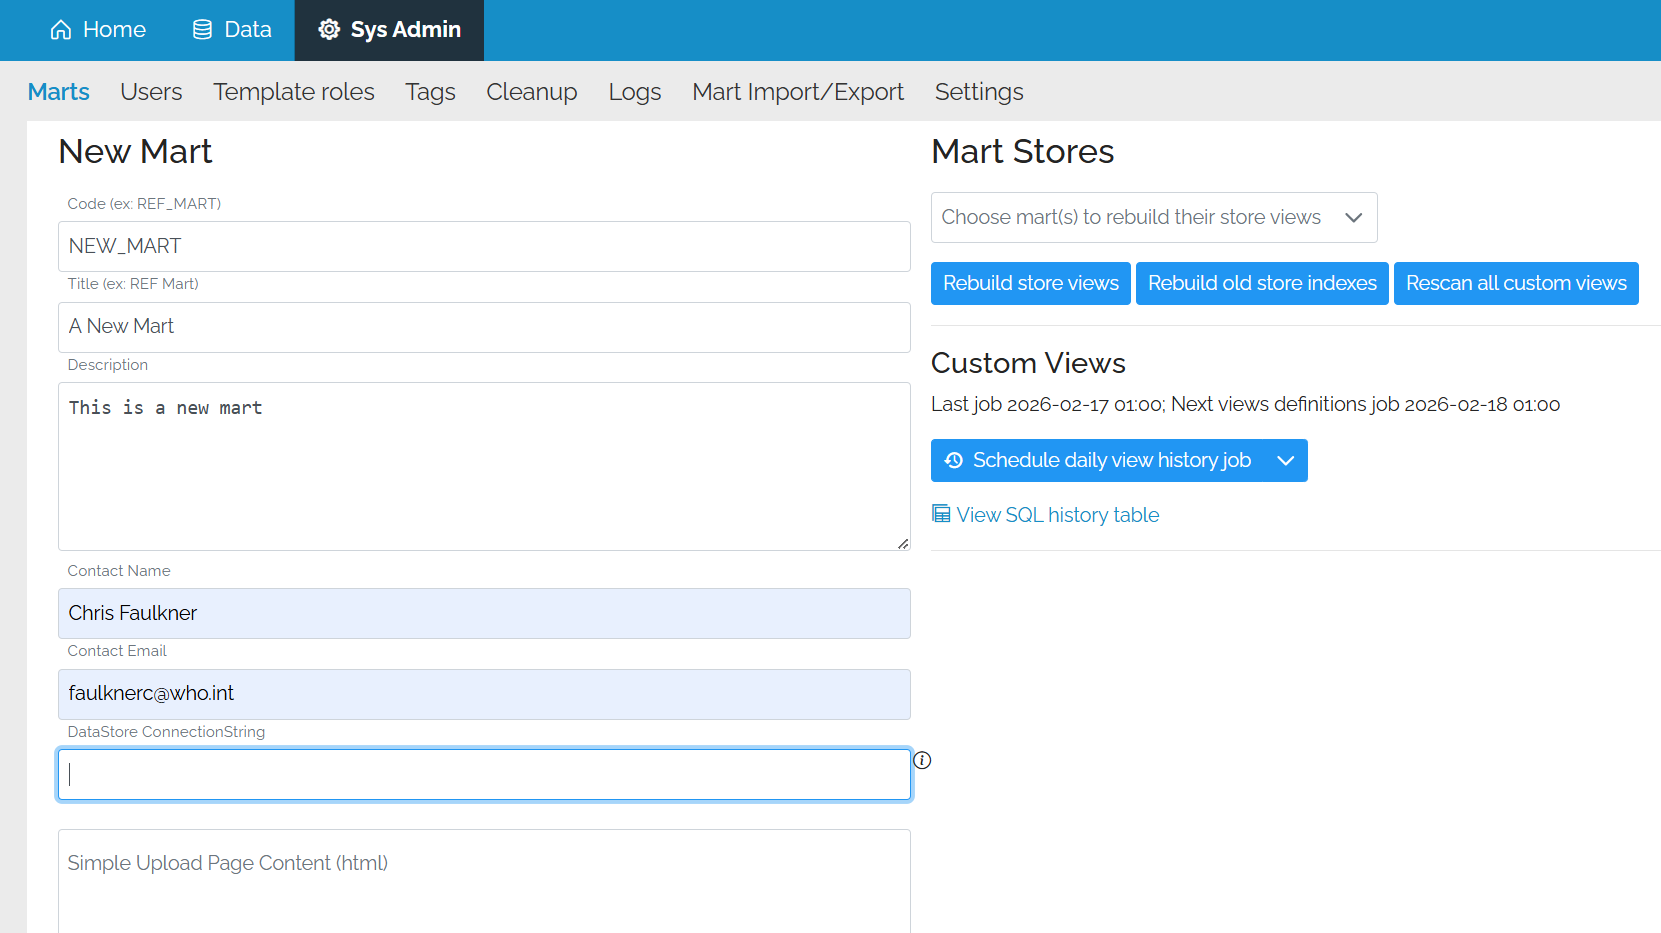
Remote Marts
Underneath the contact details, there is a box marked Connection String. If the mart is a remote mart on another server, enter the connection details here.
Training Marts
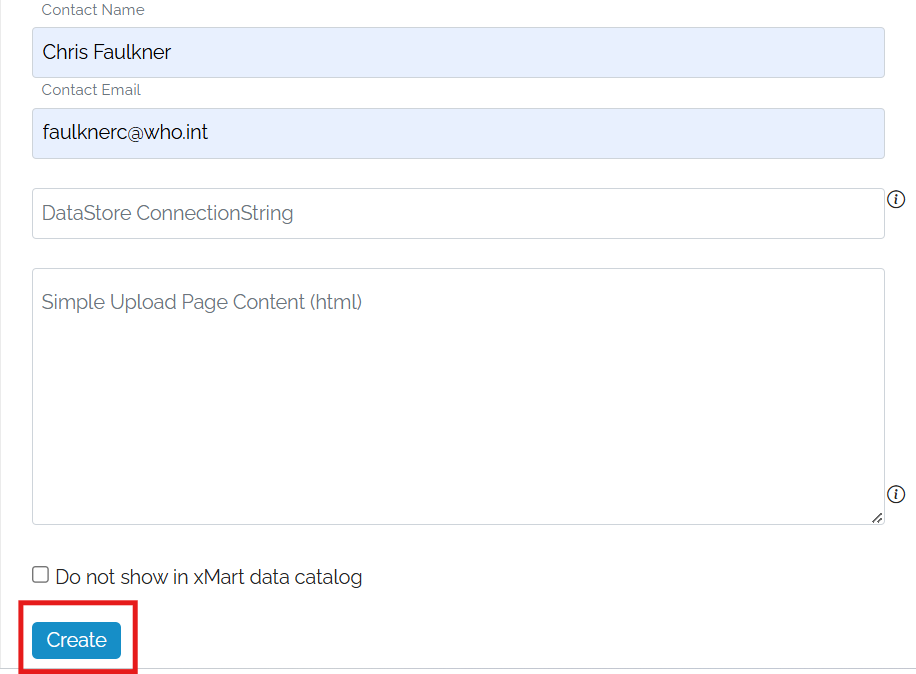
If the mart is a training mart then click on the option not to show it in the System Catalog. This will prevent it from appearing when the users search for data across all marts.

Create the mart
Create the mart by clicking Create. The mart will be created and you will be redirected to the home page of the new mart.
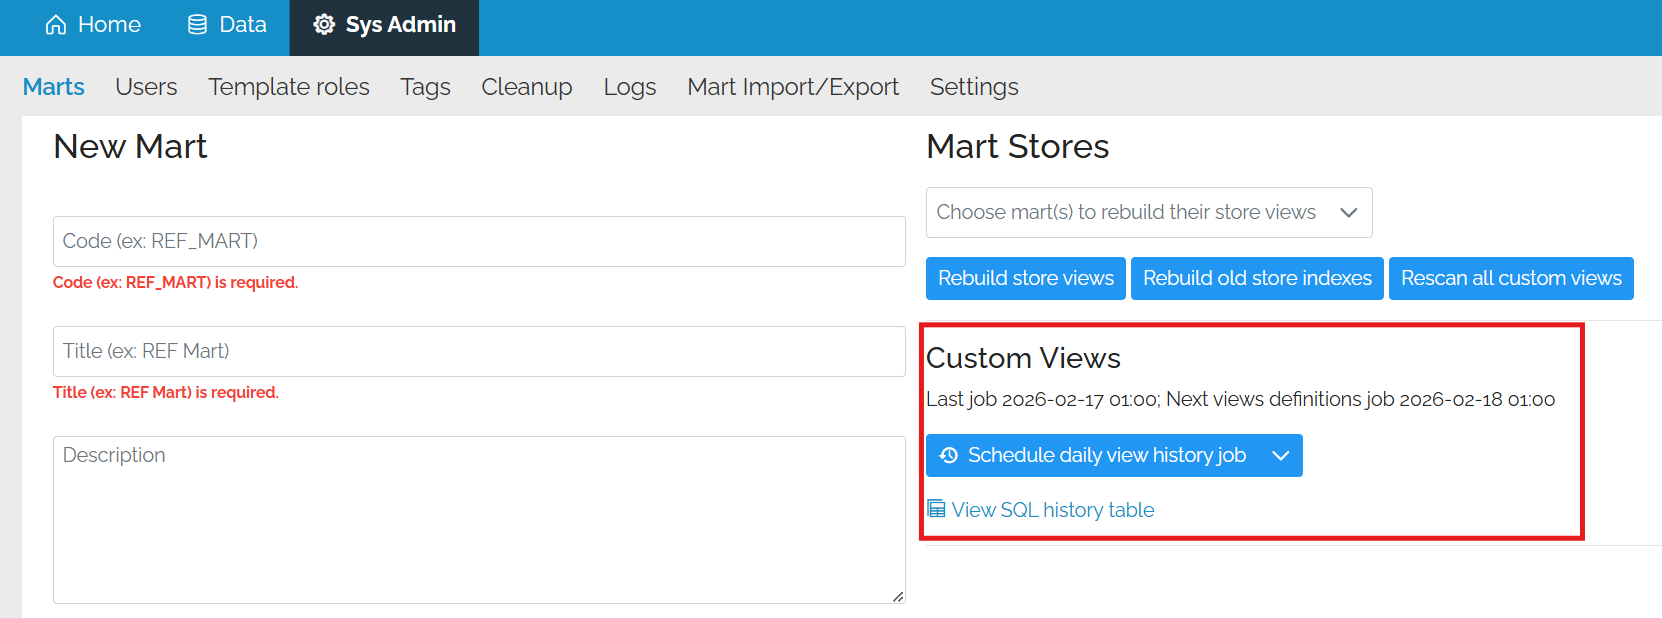
Mart Stores Area
To the right of the Create Mart form is the Mart Stores area.

This is where special operations can be performed on one or many marts.
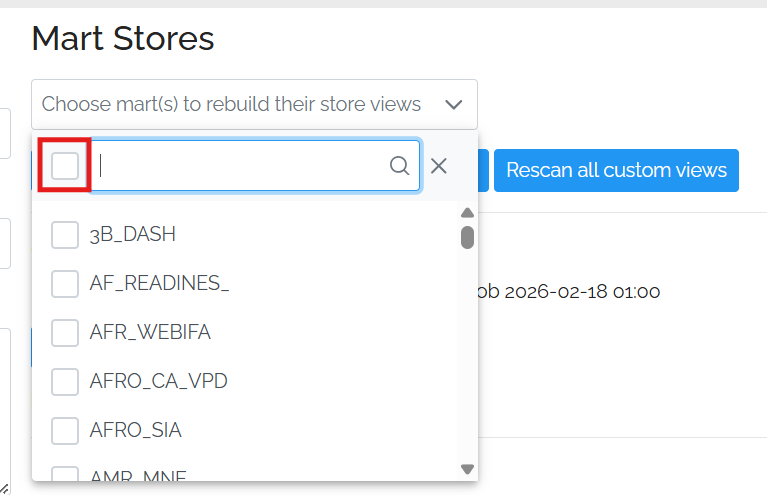
Select the marts to operate on
By clicking on the down arrow of the drop-down, one or many marts can be selected. There is a search box at the top of the list.
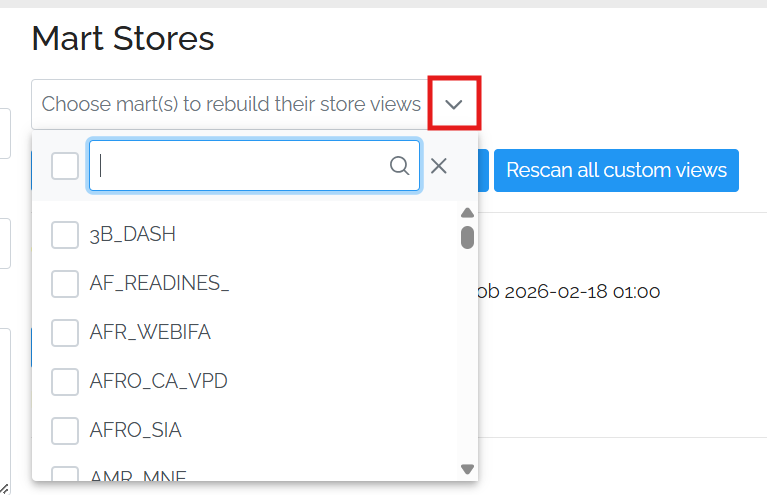
To select all marts, click on the checkbox to the right of the search box at the top of the list.
Rebuild Store views
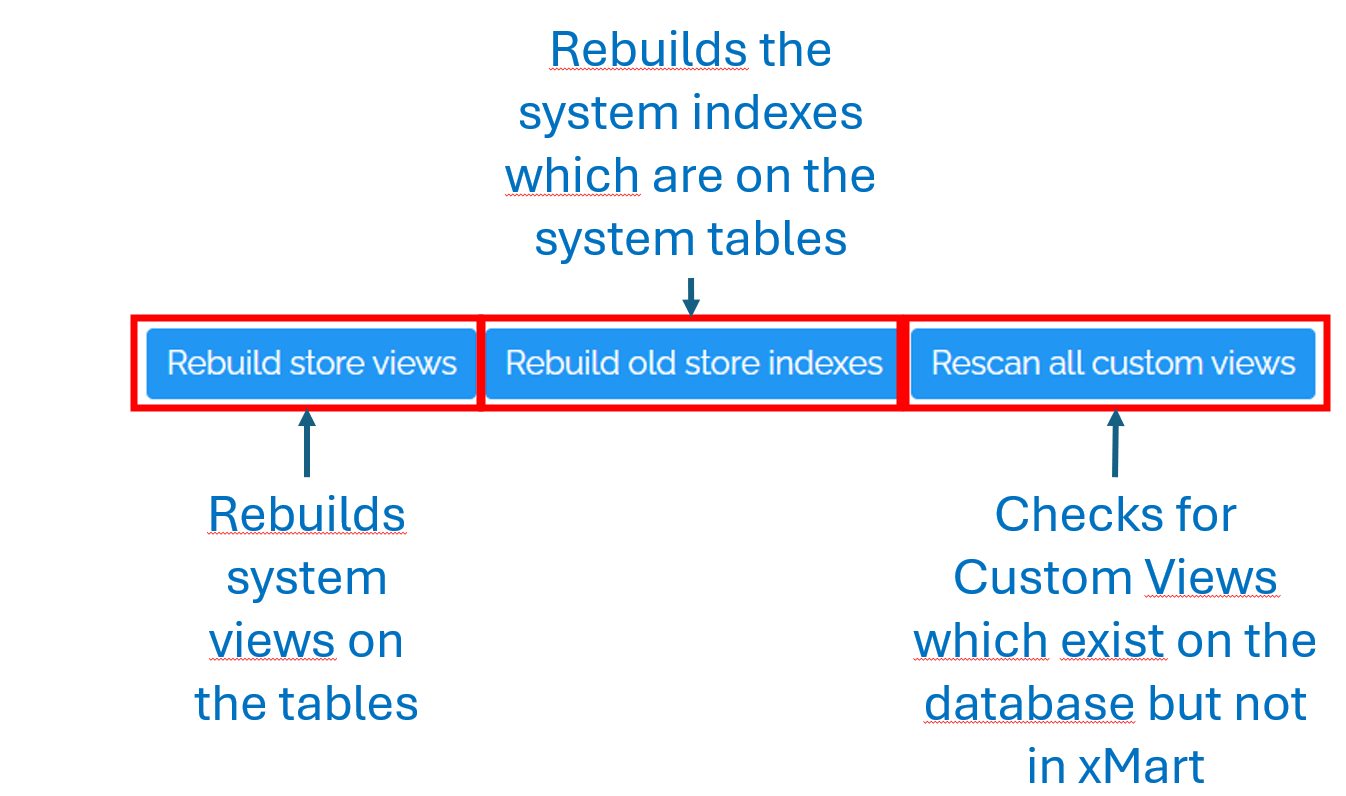
This is used to rebuild the system table view. This is a view which the user sees and does things like substituting the Sys_Title in the FK fields. This would be used in the event of a change to the way how store views are created (for example if the system has changed to add a calculated field to the default view) or if there is an issue with the view which can happen.
Rebuild store indexes
This rebuilds the system indexes on the store tables. This can help with reducing fragmentation which can speed up reads.
Rescan all custom views
Users can create and change SQL views directly on the database. There is a job which runs which looks for and additions and changes. Sometimes, a user has added or changed a view and wants to see the change immediately. Rescanning looks for any changes and applies them to the mart. If the view is new to xMart, it will need to be registered to appear like a table.
Mart Custom View Area
Below the Mart Stores area in the Custom Views area.
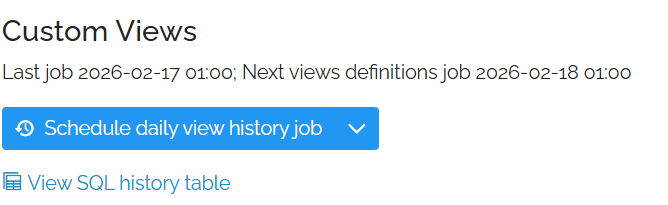
Schedule Daily View History Job
Users can create and change SQL views directly on the database. There is a job which runs which looks for and additions and changes and applies them to xMart. This allows the sys admin to change the schedule of that job. This change will apply to all marts.
The options are Hourly, Weekly and Diasble Job.
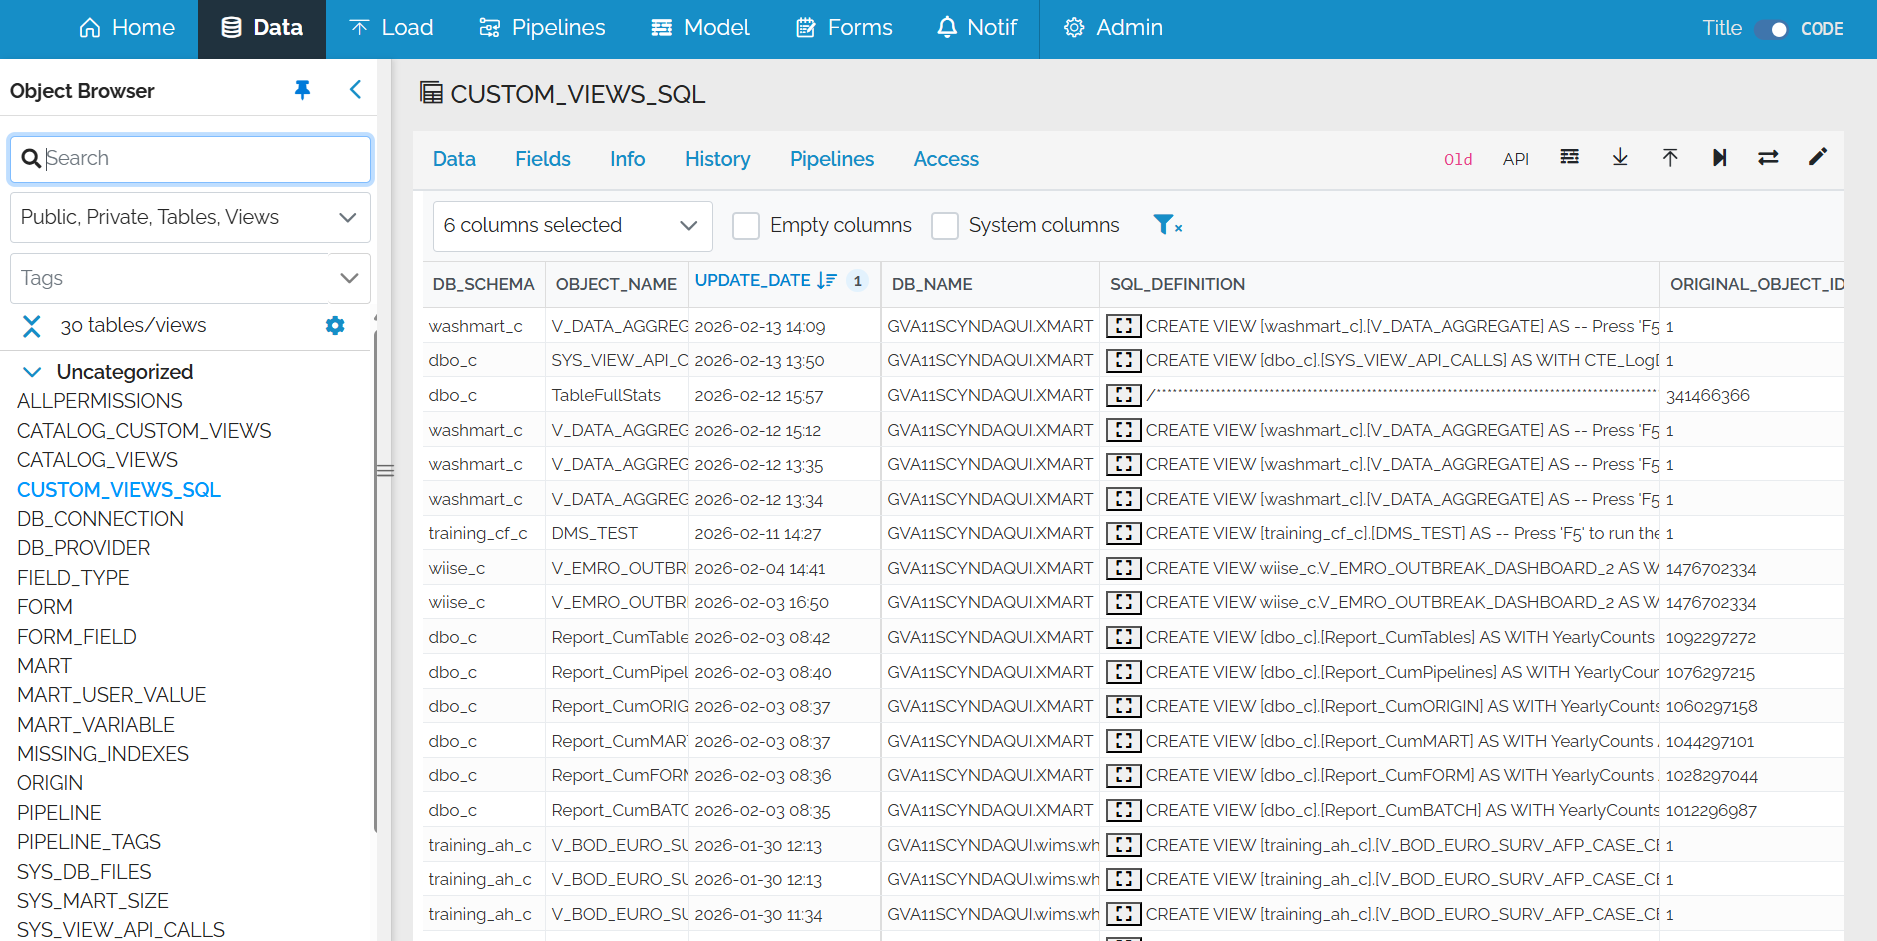
View Custom Views SQL history table
This takes the user to the SQL History view. This is the contents of the CUSTOM_VIEWS_SQL system table