Write a HowTo
This article is for the xMart support team. It explains how to write a HowTo article and upload it to GitHub. The approach supports dragging and dropping of images and other resources to simplify the authoring process.
In a nutshell:
- Install Jekyll (one time)
- Pull the latest xMart source code from GitHub
- Navigate to the documentation folder
- Create/edit howto articles using your favorite MarkDown editor
- Commit and push your changes to GitHub
Preparation
Install Visual Studio Code
This article is using Visual Studio Code which is Open Source and does not require a licence.
Install GitHub
There are lots of articles on the internet about how to pull source code from GitHub. You would first need to install Git or Github Desktop and also probably some helpful Git UI utility like TortoiseGit.
Write the Article
Get the latest xMart source code from GitHub
Attach the repository to your GitHub interface of choice. And get the latest version of the master branch.
Open Visual Studio Code and get the Repository
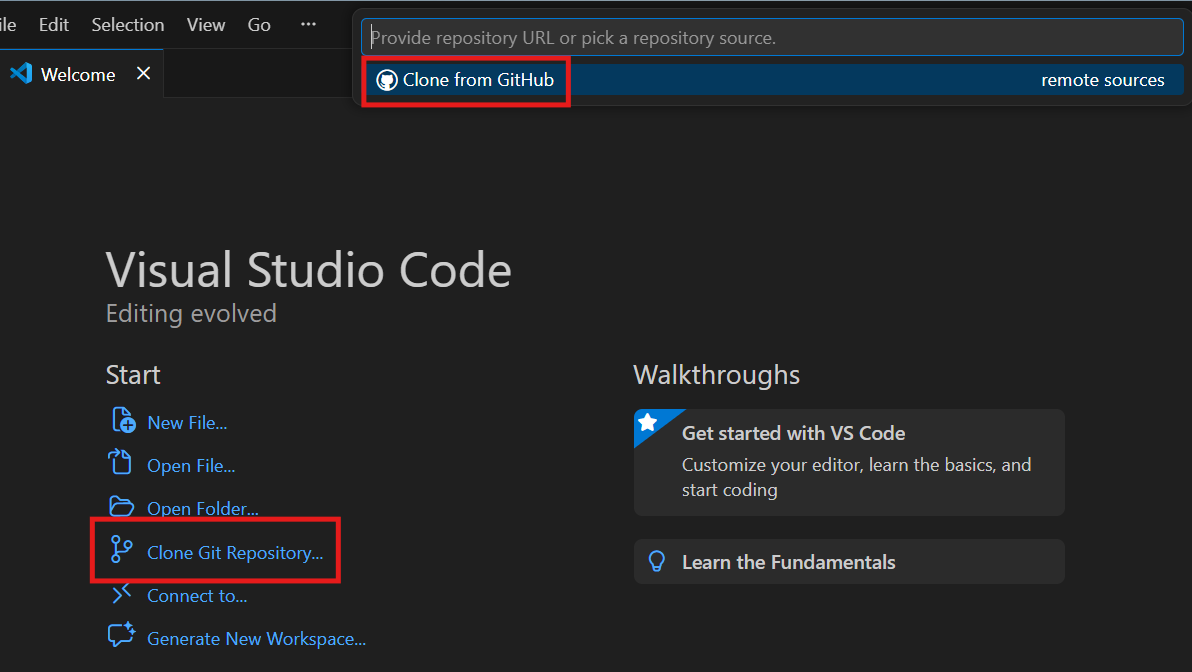
Open Visual Studio Code and from the Welcome screen select Clone Git Repository then Clone from GitHub
Choose the xMart repository and the folder to put it in. If you have previously chosen a folder, this won’t be necessary.
Once the repository has been cloned, you can open it from the pop-up.
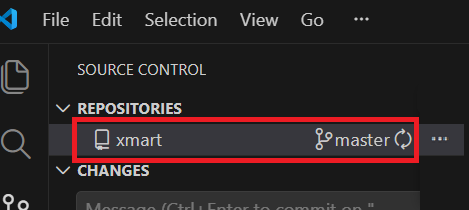
When it is open, you should see the repository and branch at the top.
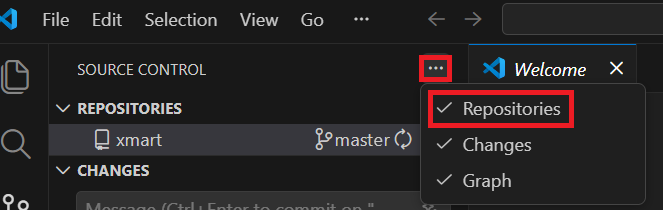
If you can’t then click on the three dots next to the Source Control at the top and select Repositories from the drop down menu
Create Branch
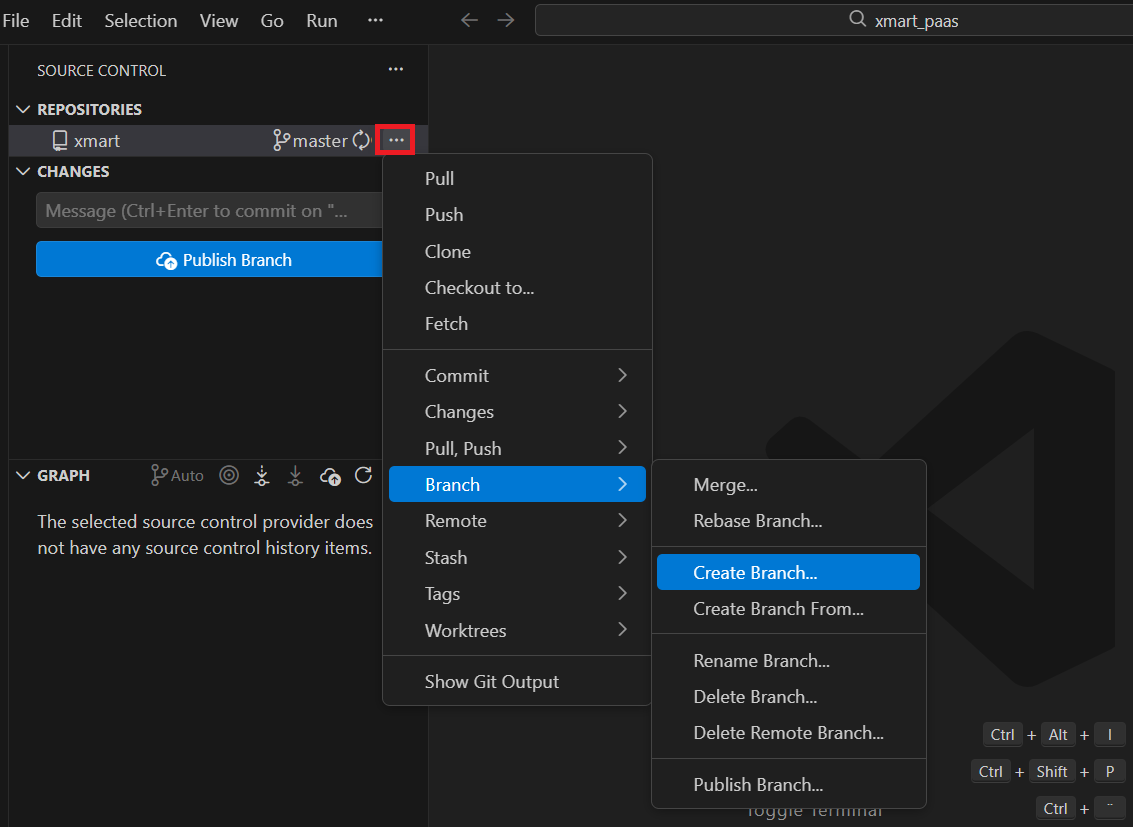
Click on the 3 dots next to the repository name, select Branch then Create Branch
Enter the name of the branch at the top and press enter.

Navigate to the documentation folder
Click on the Explorer icon
![]()
The HowTo documentation is located in the xmart\docs\user\articles folder.
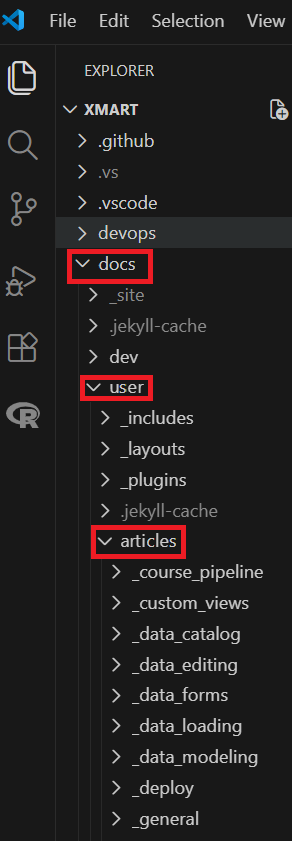
There is one folder per topic. Each folder begins with an underscore character and corresponds to a Jekyll “collection”. The “user” folder above the “articles” folder contains Jekyll setup files (described below, but you don’t need to know about that if you are just writing articles).
Edit articles
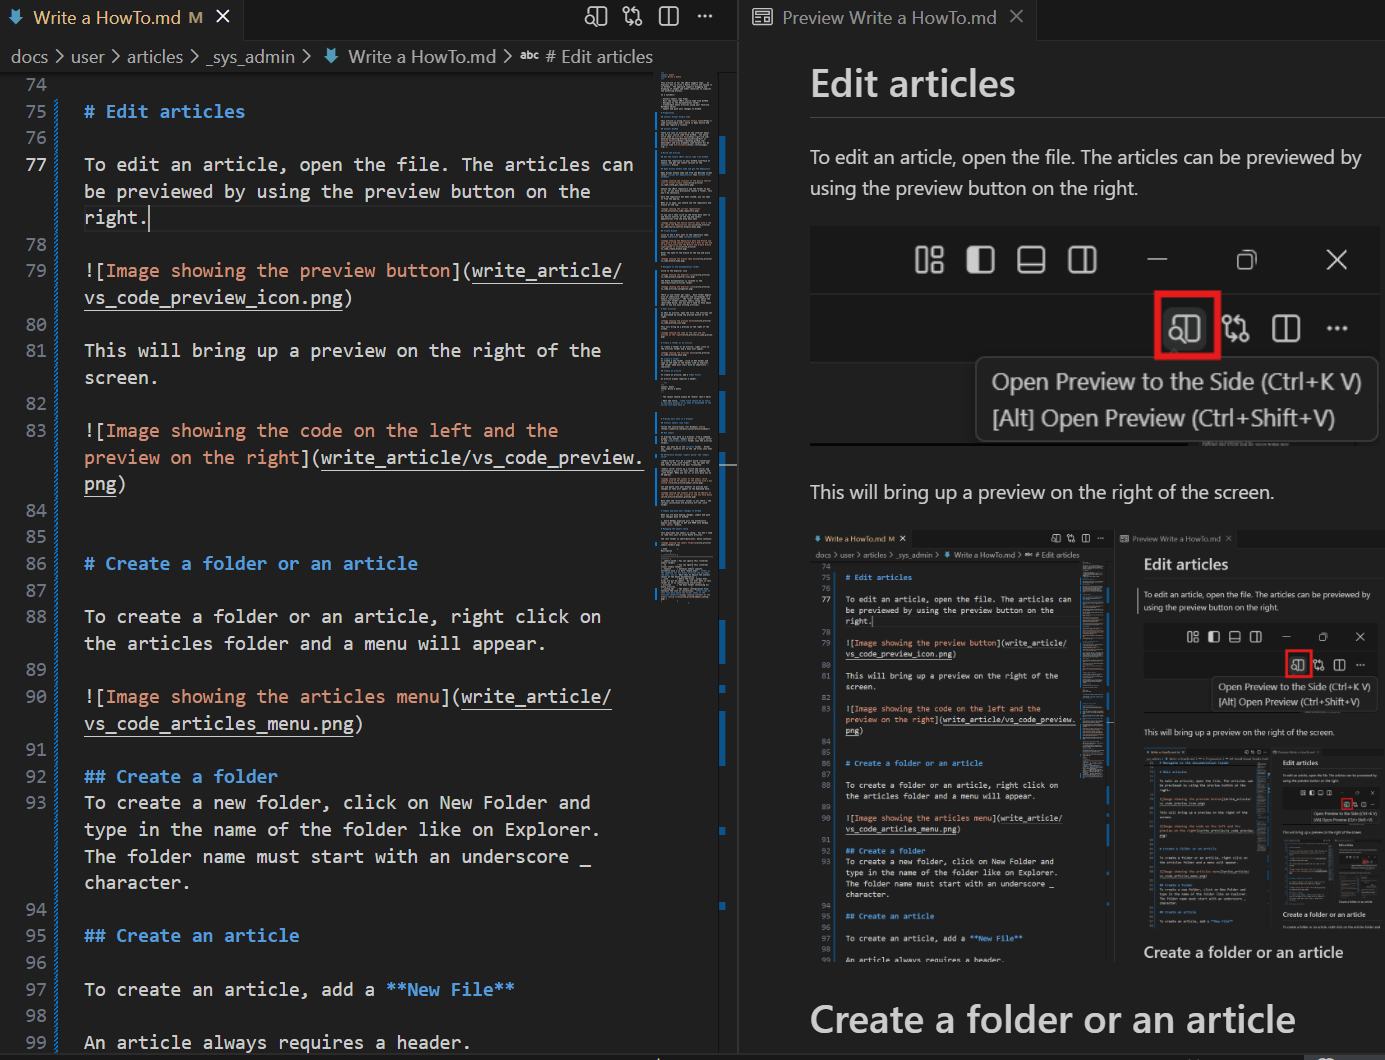
To edit an article, open the file. The articles can be previewed by using the preview button on the right.
![]()
This will bring up a preview on the right of the screen.
Create a folder
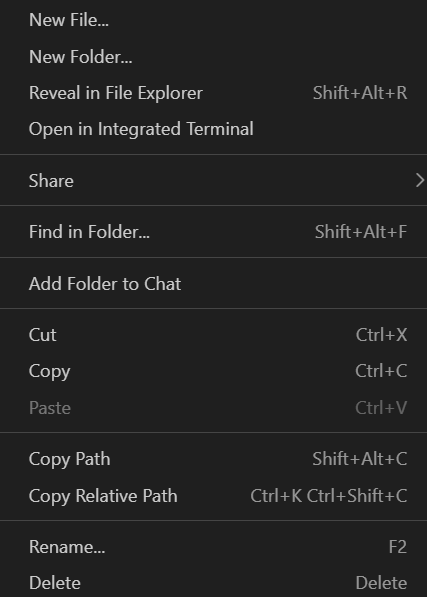
To create a folder or an article, right click on the articles folder and a menu will appear.
Create a folder
To create a new folder, click on New Folder and type in the name of the folder like on Explorer. The folder name must start with an underscore _ character.
Open the config.yml file in the articles folder
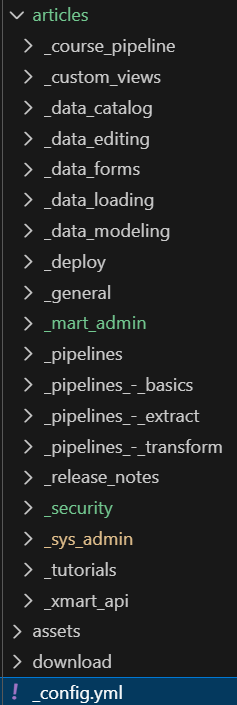
Add your folder to the list using without the leading _ character and with a sequence indicating where it should appear in the list. So if the folder _mart_admin had been added and it should appear near the bottom of the list, the code would be
  mart_admin:
    category: 'howtos'
    output: true
    sequence: 800
If you are using jekyll to view the data, you will need to restart it to see your folder in the list.
Create an article
To create an article, add a New File
An article always requires a header.
---
layout: howto
title: Write a HowTo
---
-
The layout should always be “howto” (don’t edit)
-
Edit the title. The title should be as short as possible because it is what is displayed in the narrow left-hand menu.
Write an excerpt
In order to make the search facility more useful, each article should have an introduction at the top which gives a brief summary for the article. This is displayed when the search finds the article. If there isn’t an excerpt, the search will show the first 100 words.
To do this, write the introduction and then insert the following text
<!--end_excerpt-->
Preview your work in a browser
Install Jekyll (one time)
Follow the instructions (for Windows) here
Run jekyll
To preview your work in a browser, from a command prompt, run either “jekyll build” or “jekyll serve” in the xmart\docs\user folder (not the articles folder).
Note, you must be in the user folder. Either way, jekyll converts all of the .md files into html files.
Difference between “jekyll build” and “jekyll serve”
“jekyll build” will do a single build (conversion and copy to the _site folder). You can open the html files directly from your filesystem.
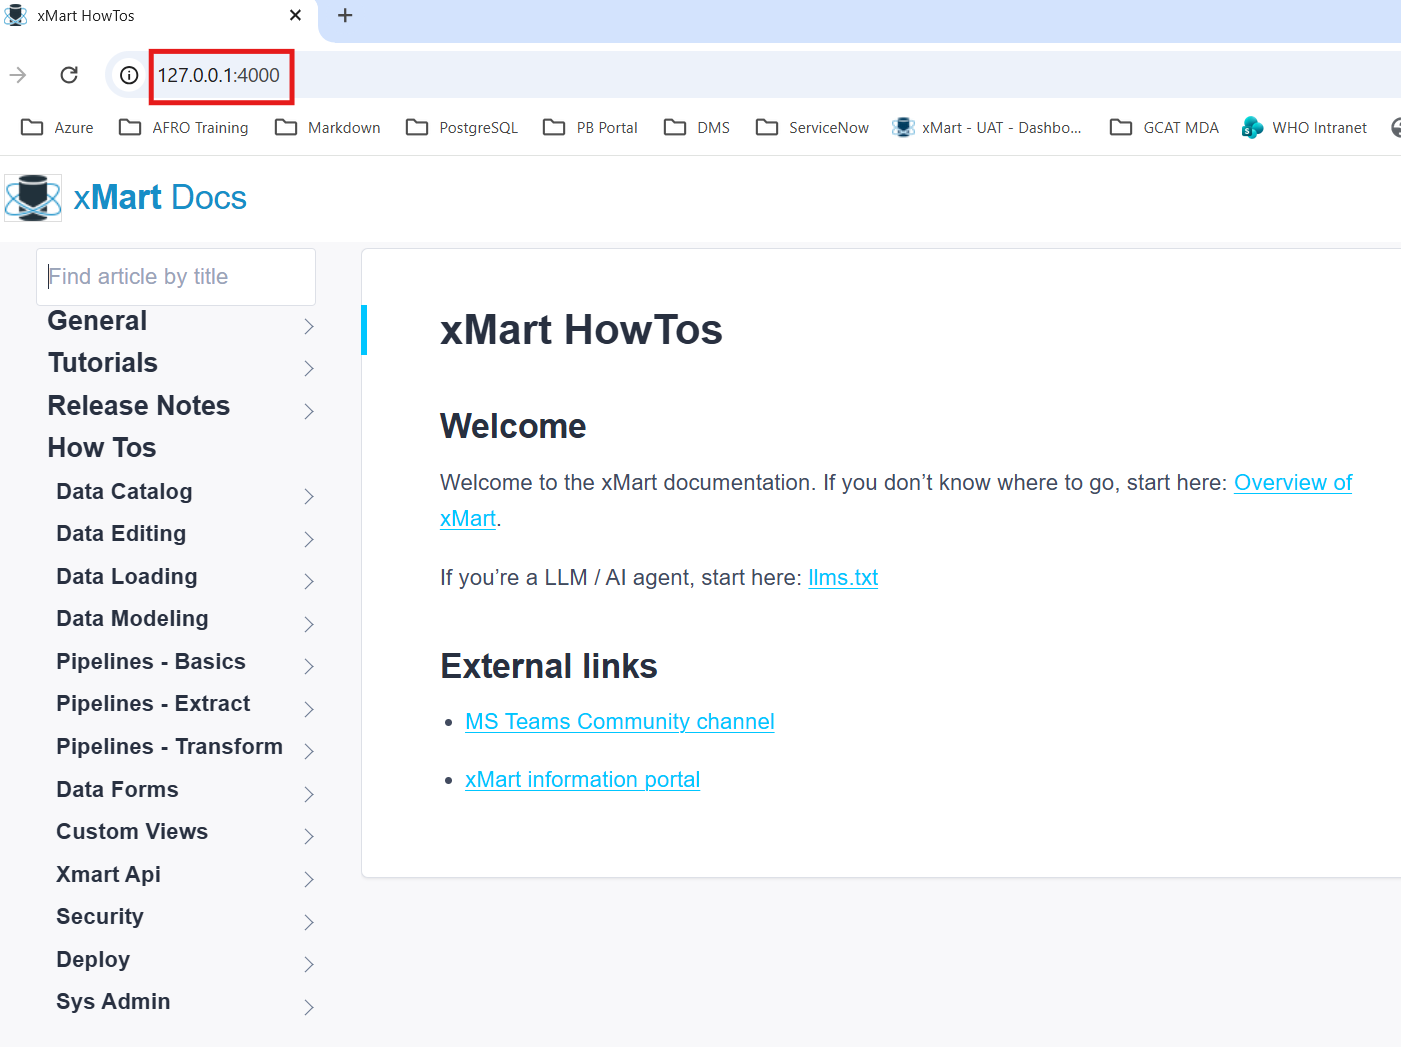
“jekyll serve” starts up a little web server and continuously polls for your edits and updates the _site folder. When you run it, it will give you an IP address
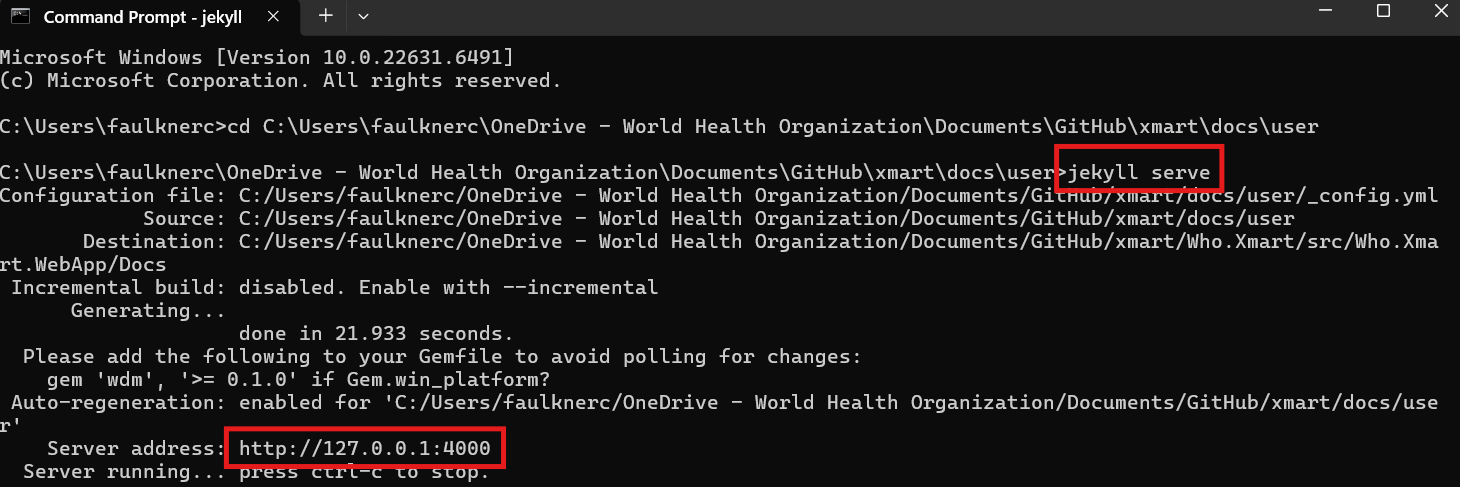
Cut and paste into your browser to preview your changes as they will appear on the deployed help.
Note that the “articles” folder is not there - the various collections are directly off the _site folder.
Deploying the changes
Commit and publish your changes to GitHub
When you are done making changes, commit and push your changes back to GitHub.
To do this, click on the Source Control icon
![]()
This will bring up a Commit Panel.
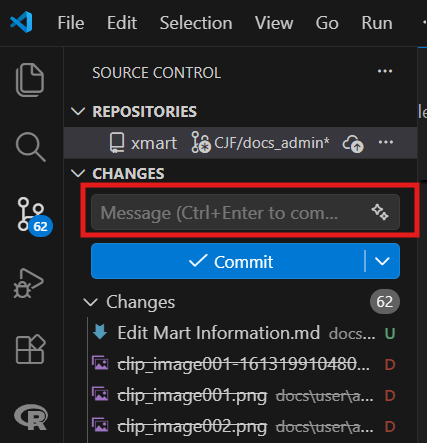
Enter a message and press Commit.
The message now changes to Publish Branch
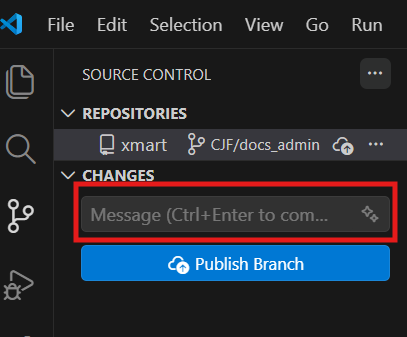
Enter a message and press Publish Branch
Merge to master and deploy changes
When all of the changes have been made, you need to create apull request to Master. When this is done, the Azure pipeline is run to deploy the changes but it is not the correct one. You will need to go to the build pipelines and run build-web-docs-jekyll to build the changes and then release them using Deploy Web DOCS (uat+prod)
Managing the Jekyll setup
This describes how Jekyll is setup. You don’t need to read this just to write HowTo articles.
The root folder is xmart\docs\user, which contains:
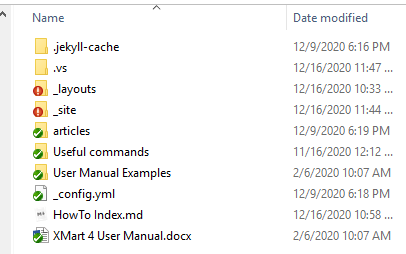
| Item | Description |
|---|---|
| .jekyll-cache | You can ignore this (internal jekyll folder) |
| .vs | You can ignore this (internal visual studio folder) |
| _layouts | Contains Jekyll layouts. Currently only 1 is here “howto.html”. This is the template for all howto articles and includes the menu, etc. Edit this to adjust the overall layout of the howto documentation. |
| _site | Where the final, output html files are put by Jekyll. Do not ever edit in this folder as it is continuously overwritten. |
| articles | The main folder containing all howto articles. |
| _config.yml | The Jekyll configuration file. Contains the list of collections. The items in this file must match the folder names in the articles folder!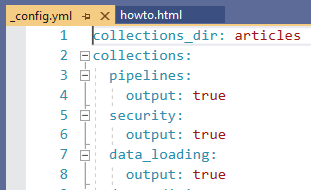 |