Edit data in UI
This article covers data editing including adding new rows, making small changes, deleting a row, saving the changes for later and committing the changes.
Go to the Data Edit Button
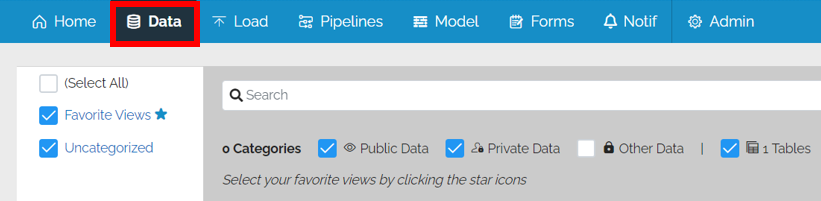
Select Data to see a list of tables.
Data Edit Mode
Go to the Data Action Panel in the top right
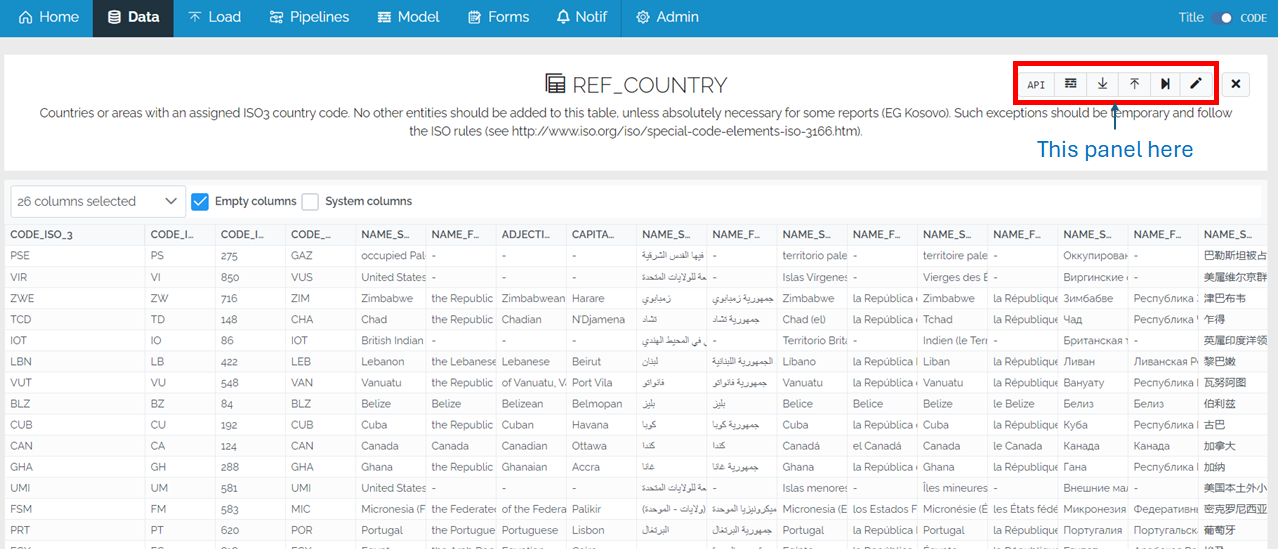
Click on the pencil to switch to edit mode.
![]()
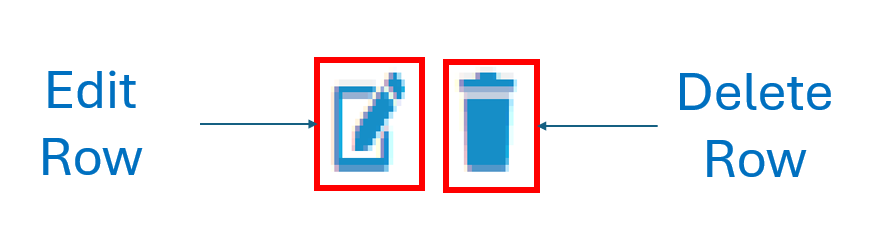
The Sys_Actions column
The screen has now changed to the Data Edit Grid with a new Sys_Actions column on the left.
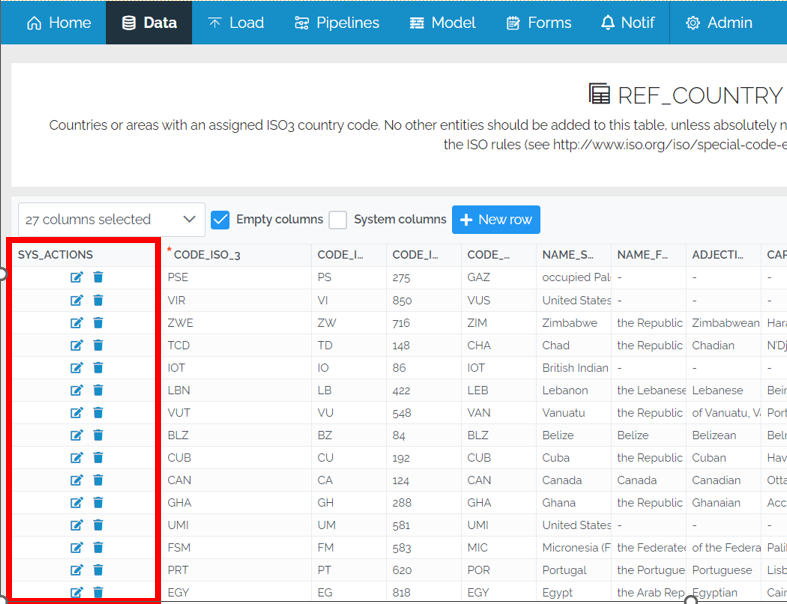
This has two icons
Data Editing using the Data Edit Form
If you edit a record by clicking the Edit Row icon on that row you will open the Data Edit Form.
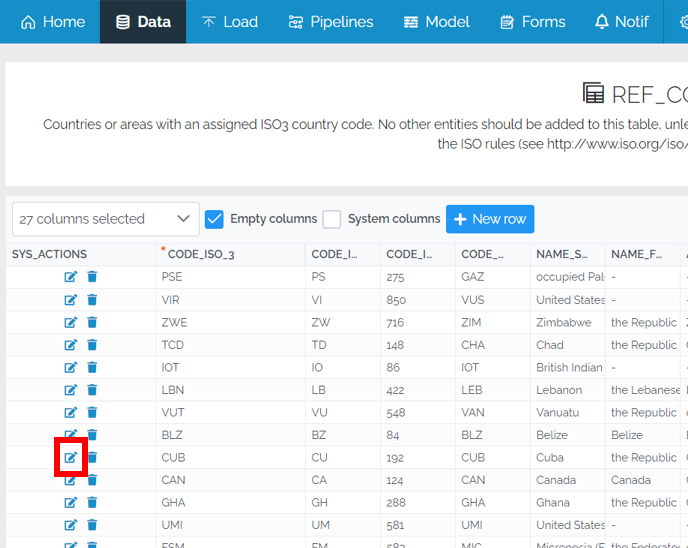
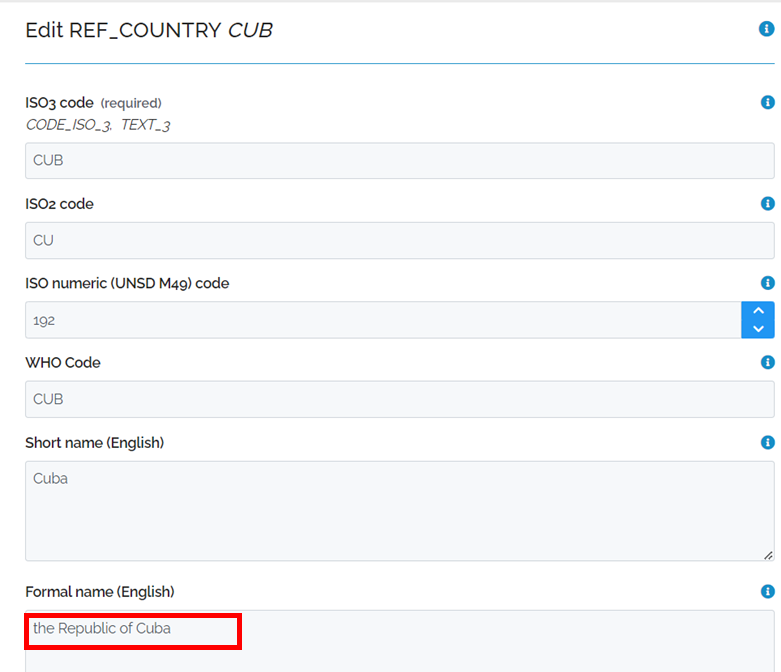
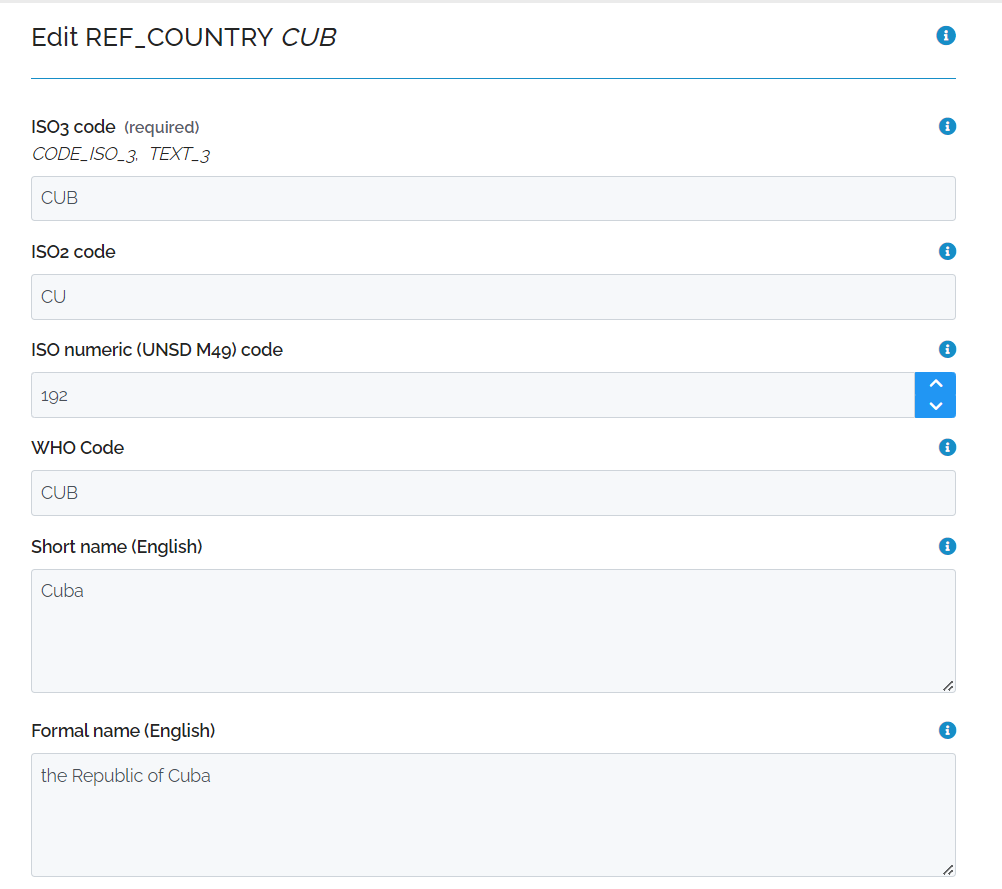
The Data Edit Form
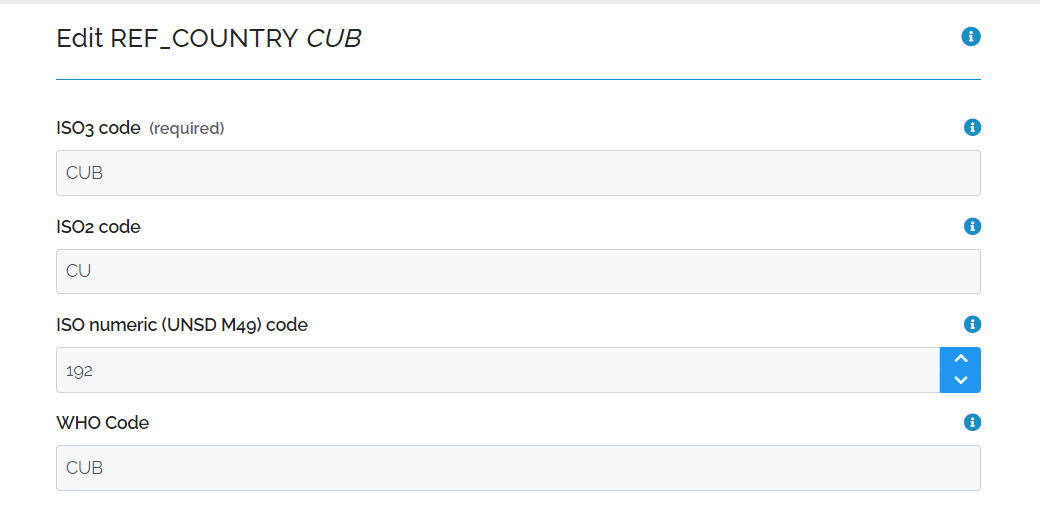
The Data Edit Form displays the list of columns and theit current values.
The text displayed for each field come from the Display name of the column in the data model. If the field is a text field then the user can type up to the length of the field. If it is another type then there will be a type-appropriate control. For example, if the field is a date then they have a calendar, if it is a numeric type then they get a up-down arrow control and so on.
Get Field Code and Type
By pressing on the blue “i” on the right of a field, the field code and type are displayed. Clicking on the one at the top displays this information for all fields.
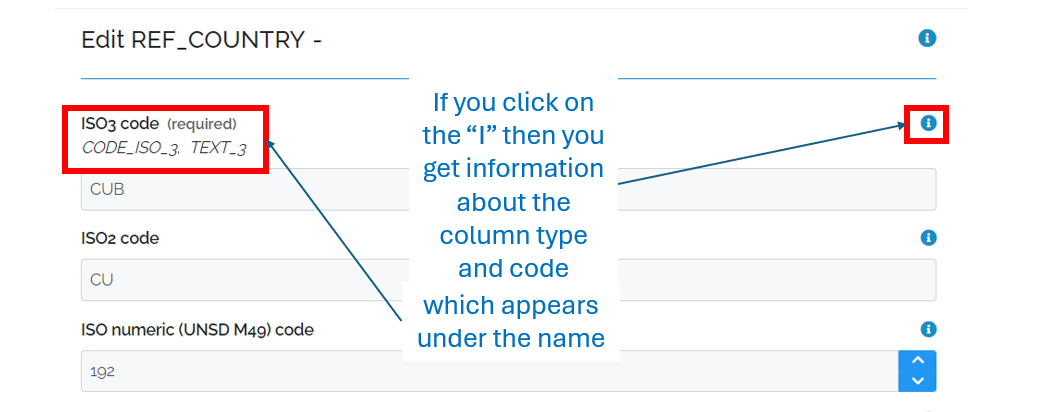
If you click on the “i” in the heading area, you get the information for all of the columns.
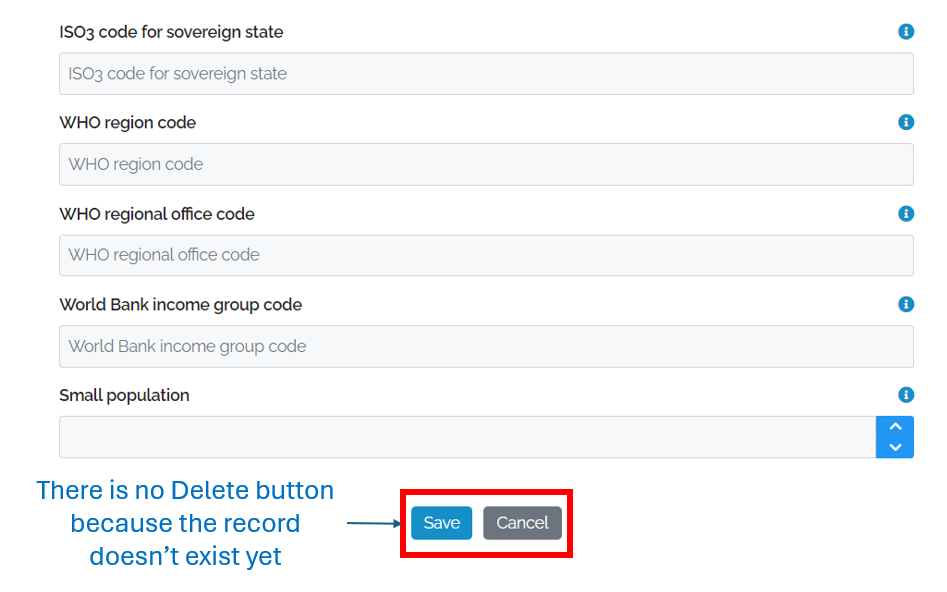
Make a small change
Remove the word “the” from the Formal name in English
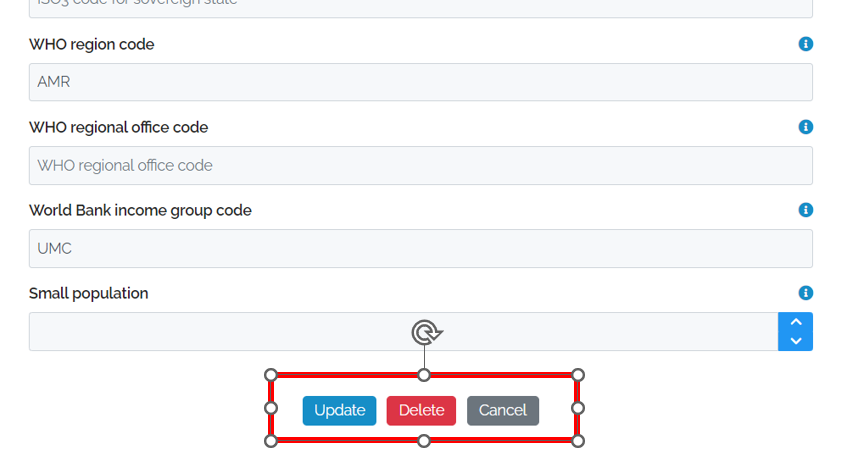
The Data Edit Form Action Buttons
At the bottom of the Data Edit Form, there are 3 action buttons
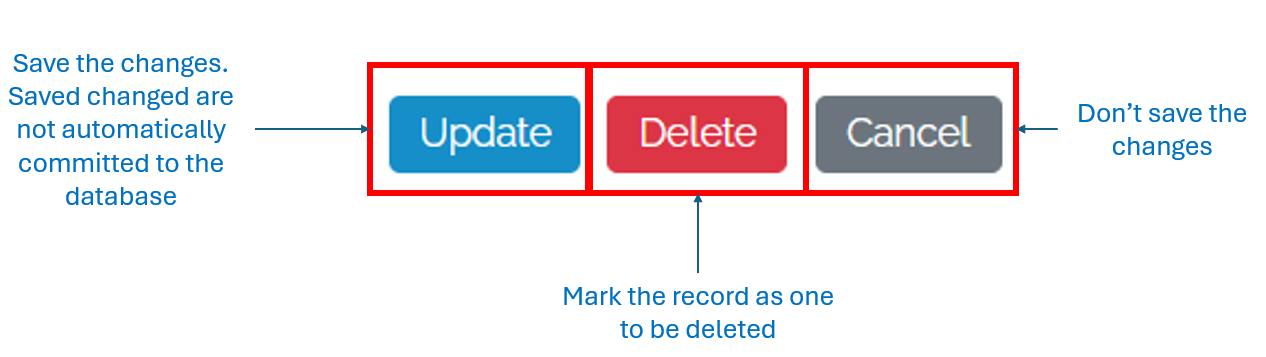
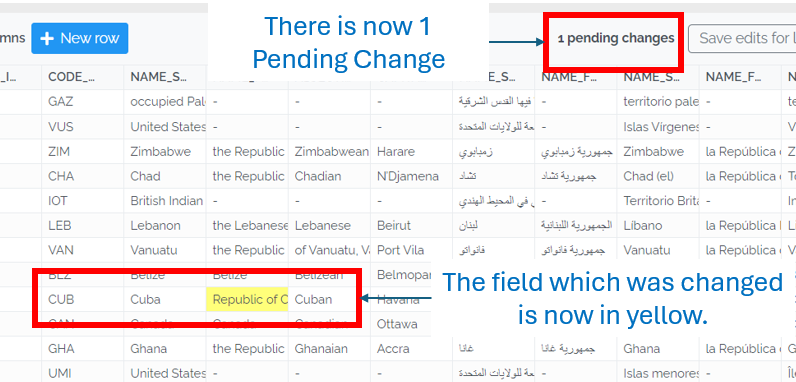
Pressing any of these returns to the Data Edit Grid. Click on Update. The Data Edit Grid now looks like this.
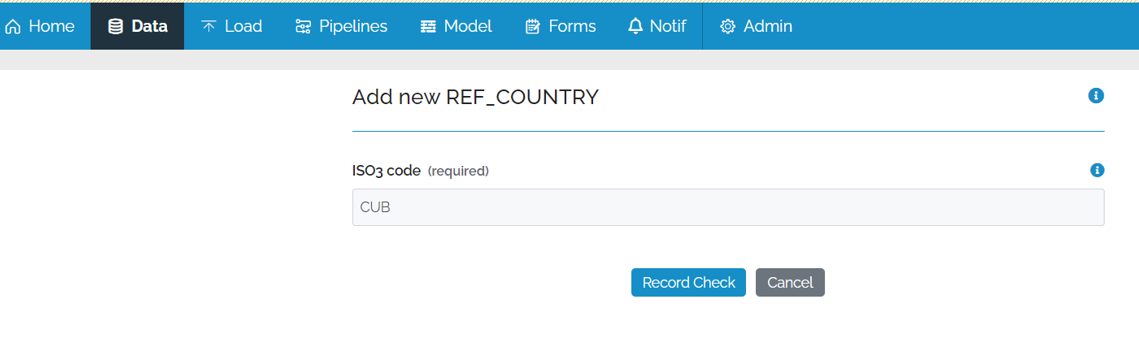
Add New Row
Clicking on the New row button opens the Data Add Form screen.

If an ISO3 code for an existing country is put in and the Record Check button is pressed then the system goes into Edit mode
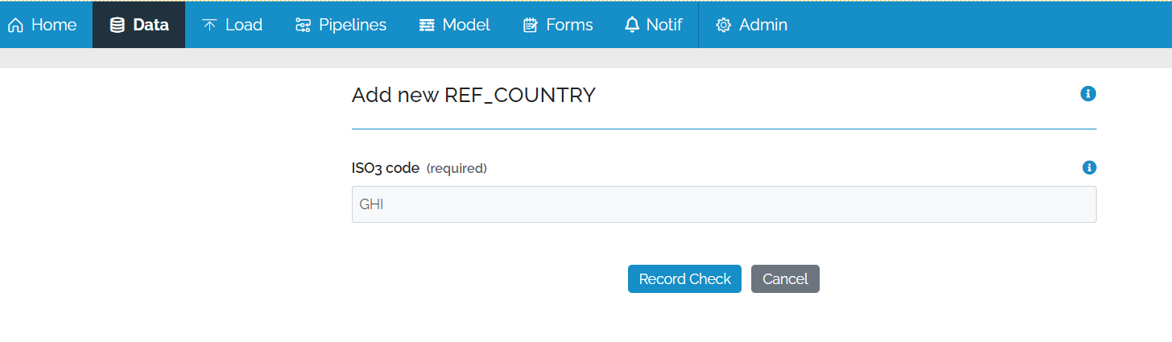
If a code which doesn’t exist is added then the Data Edit Form stays in Add mode
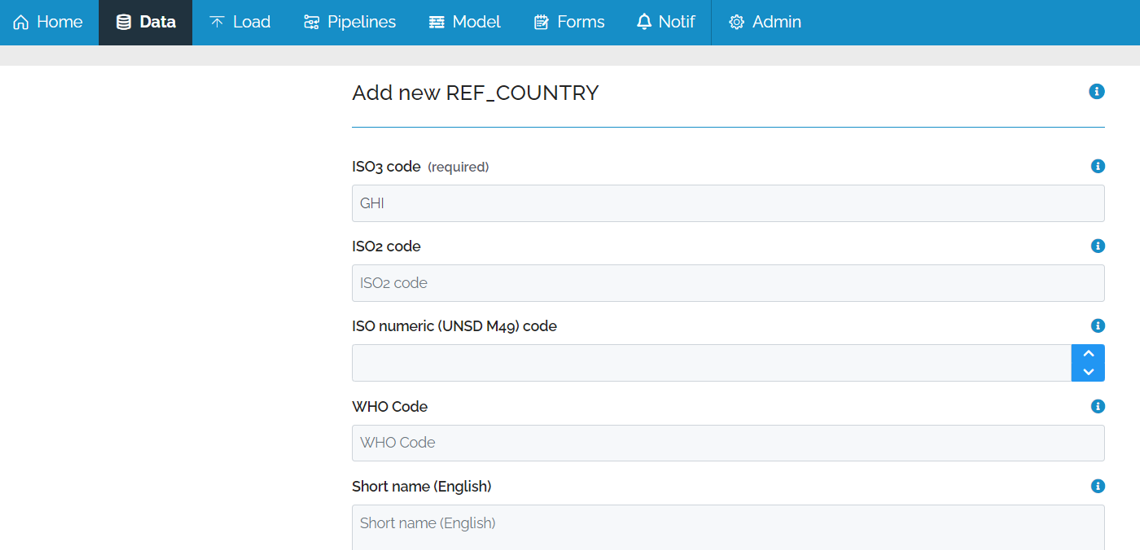
Set the Formal name (English) to “GHI Country” and save it by scrolling to the bottom of the screen and clicking on Update. This closes the Data Add Form and returns to the Data Edit grid.
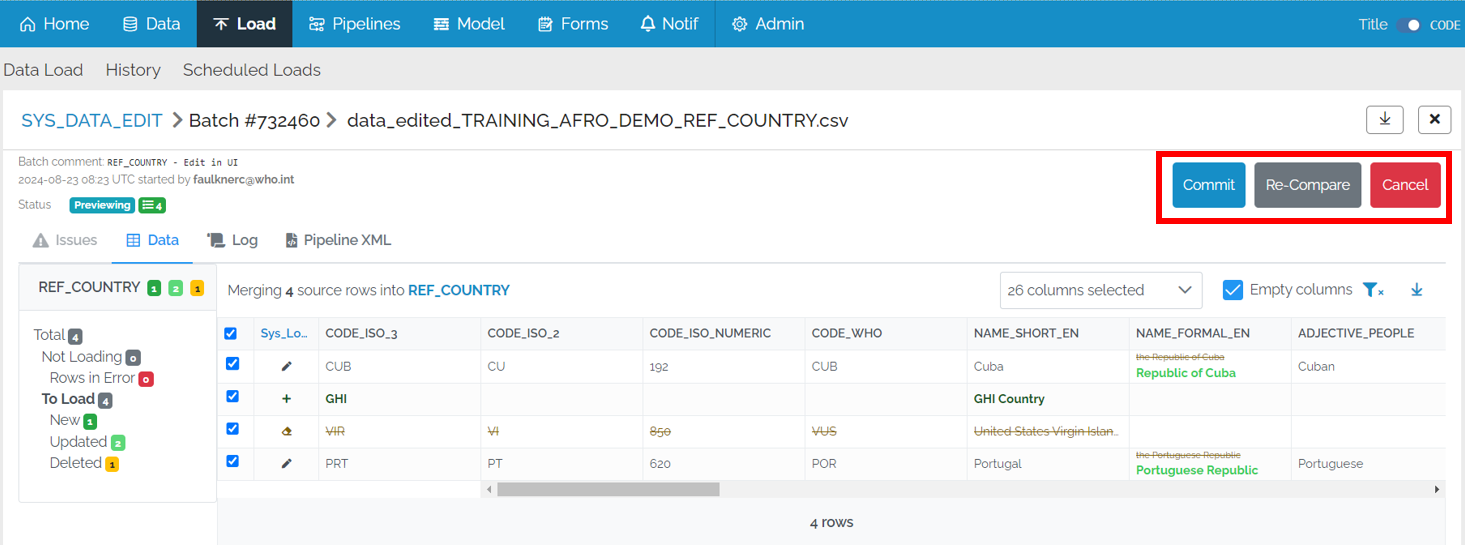
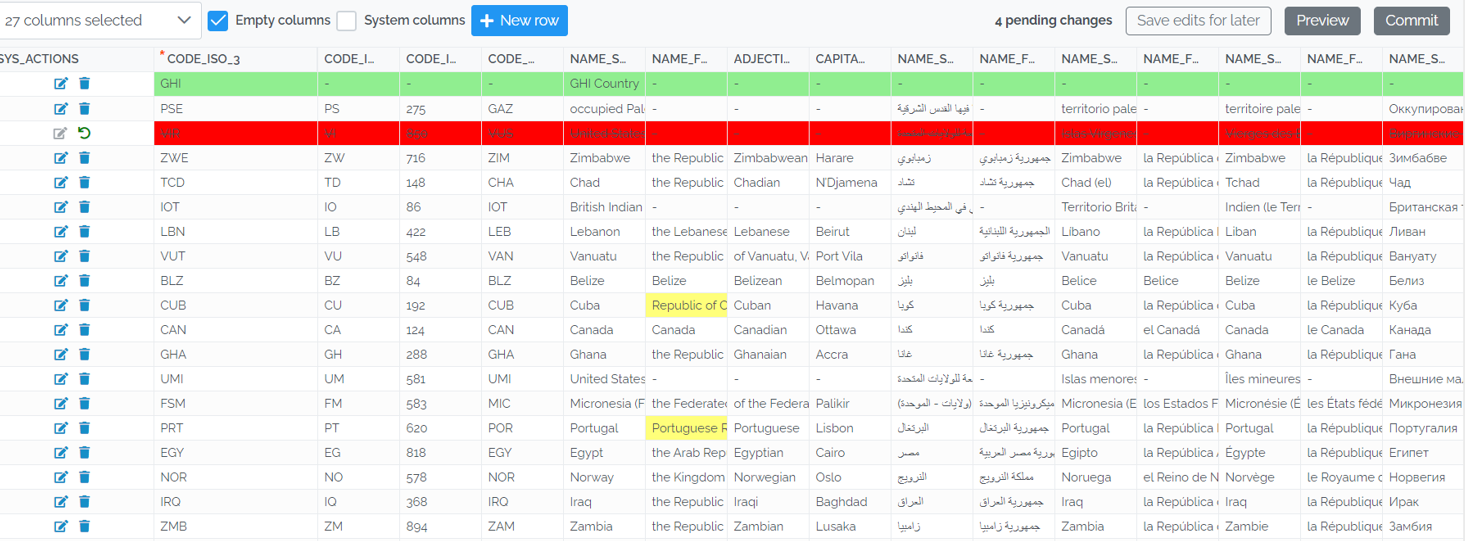
The Data Edit Grid now looks like this

As you can see, the new record for GHI is in green and the previous change to the name of Cuba is in yellow.
Data Editing using the Data Edit Grid
Data can also be changed directly in the grid in a similar way to Excel. In this example, the word “the” has been removed from the Formal English name for Portugal.
Again, the change is highlighted in yellow.
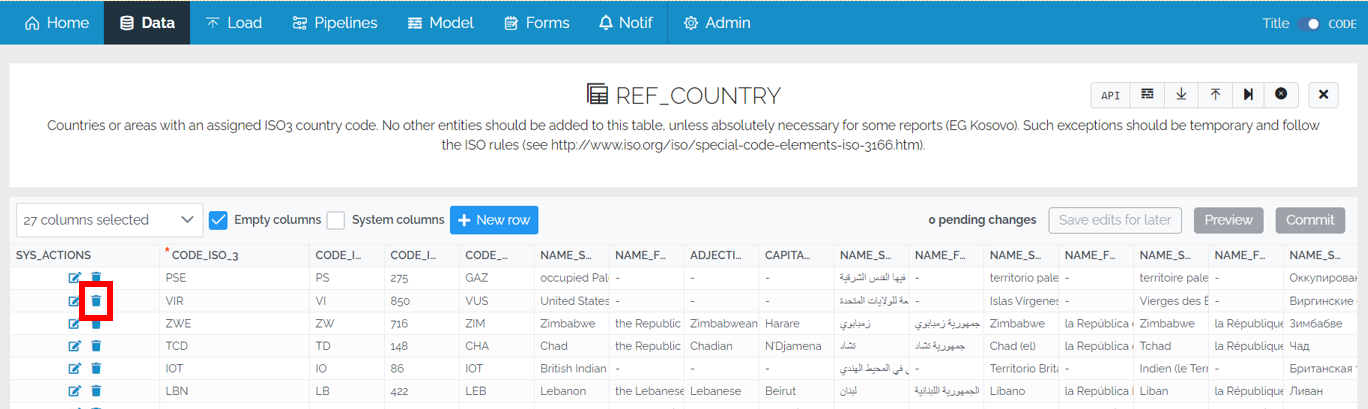
Delete a row
On the Data Edit Grid, click on the Sys_Actions dustbin icon next to a record
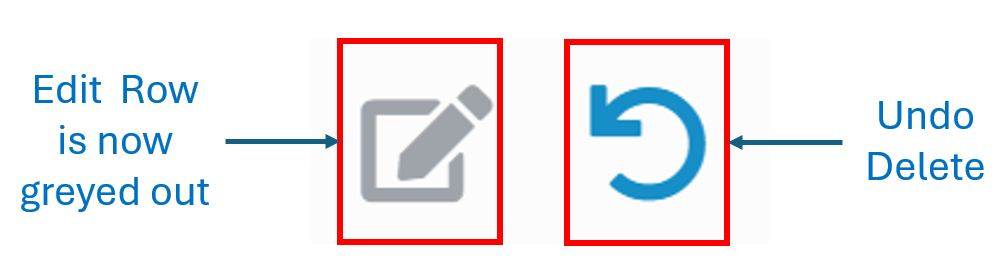
On clicking on the dustbin, the row is displayed in red and the dustbin icon becomes an Undo icon and the edit button is greyed out.
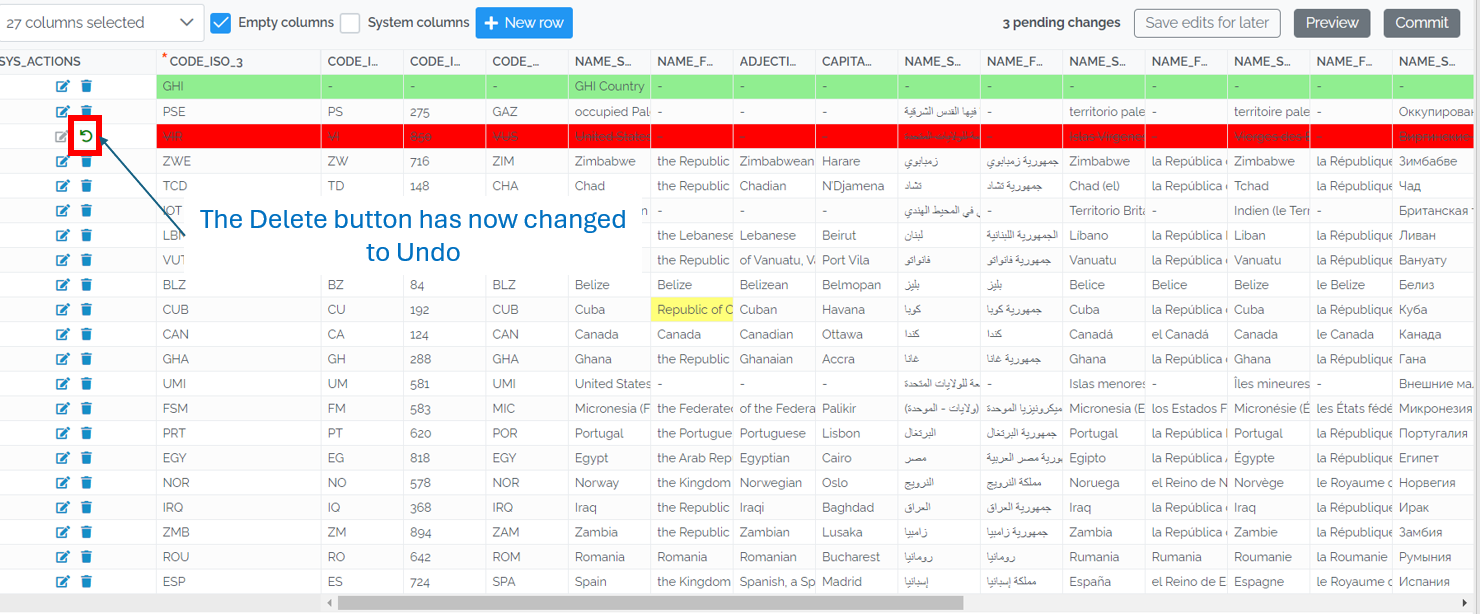
Here it is in close-up
Save Edits for Later
At the top of the Data Edit Grid, there is a button called “Save edits for later”. This button is used for if you have a lot of edits to do but can’t do them all in one go. It means that if you leave the page and come back, your edits will still be there.
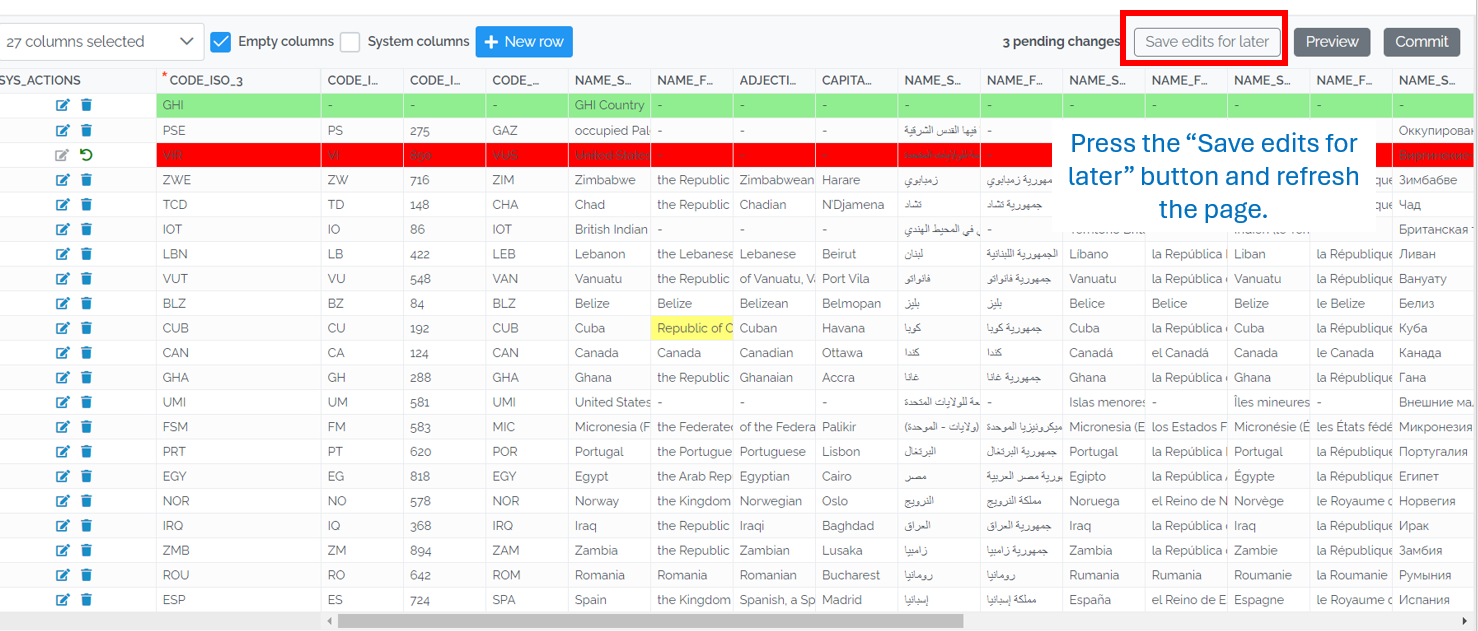
If you press it and then refresh the page, you won’t lose your changes.
Make another change (for example undeleting VIR)

Now there is an unsaved edit. If you refresh the page, you will get a message like this.
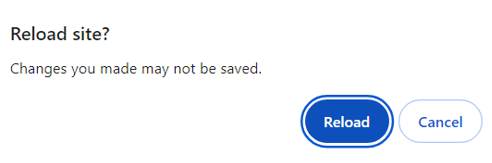
If you press reload, the VIR will still appear as deleted.
Commit Changes to the Table
In the top right of the screen are the Preview and Commit buttons
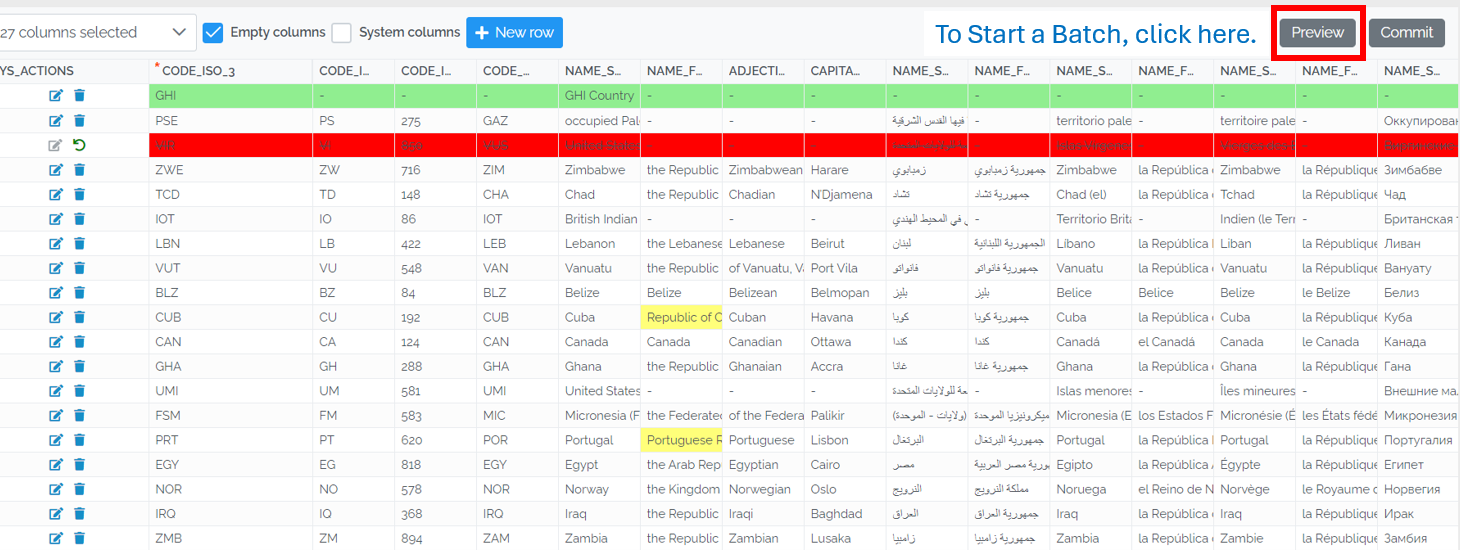
This will take you to the Batch Preview page where you will have the opportunity to Commit or Cancel the batch