Consume OData in Postman
This article decribes how to consume data from a secured API endpoint in Postman.
(note: This can only be done once confirmed that client ID provided to the xMart administrator has already been granted the rights to use the specific Mart tables data)
From a Secured Endpoint
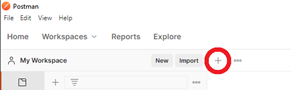
i. Launch Postman Application
ii. Add a new tab to test the API endpoint
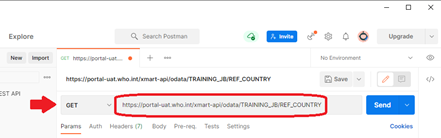
iii. Choose “GET” method
iv. Type in the API endpoint of where you want to fetch the data from xMart
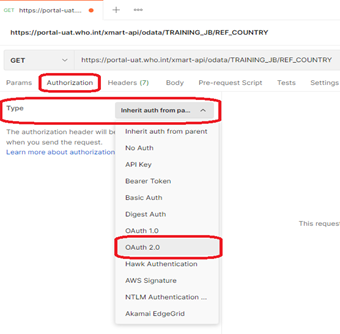
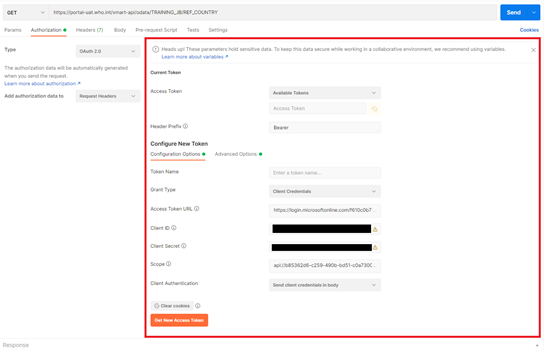
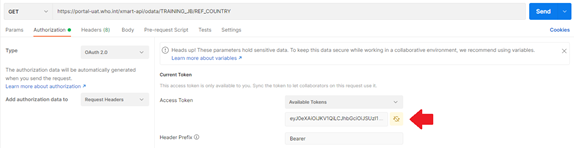
v. Click on the “Authorization” tab
vi. Choose from “Type” list “OAuth 2.0”
vii. Make sure the on the next window the “Add authorization data to” is in “Request Headers”
viii. Choose the necessary picks from the list and fill in the fields required on the tab “Configuration Options”
-
Access Token: “Available Token”
- Header Prefix: “Bearer”
-
Token Name: [Choose a name you prefer]
-
Grant Type: “Client Credentials”
-
Access Token URL: https://login.microsoftonline.com/f610c0b7-bd24-4b39-810b-3dc280afb590/oauth2/token
-
Client ID: [Your app client ID that was given to the xMart Mart administrator]
-
Client Secret: [Your client secret value for the client ID given]
-
Scope: “api://” then the client ID found here and then “/odata”
-
Client Authentication: “Send client credentials in body”
Example:
ix. On the tab “Advanced Options” fill the “Resource” field with value of the client ID found here
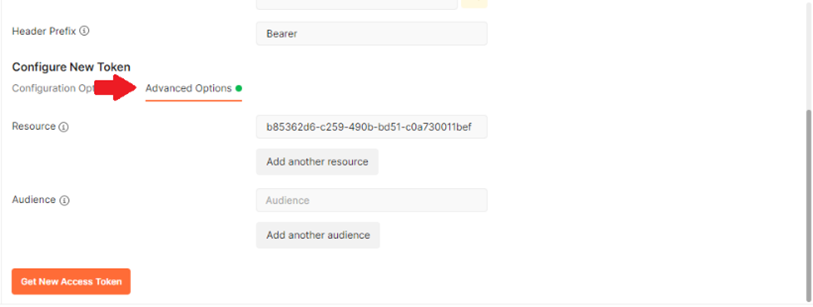
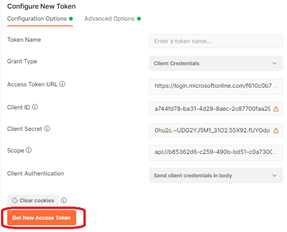
x. Click on “Get New Access Token”
xi. On the next popup window click “proceed” or wait for it to automatically close
xii. On the “MANAGE ACCESS TOKEN” popup window, click “USE TOKEN” (This will copy the Access Token to the Authorization Access Token Field)
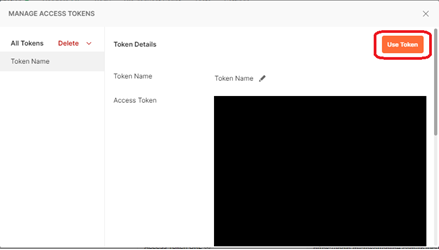
(DO NOT REPLACE THE VALUE HERE BUT IF TOKEN EXPIRED PLEASE REPEAT FROM STEP 6 ONWARDS)
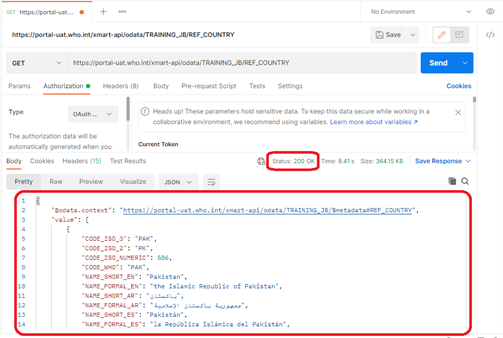
xiii. Click on “Send” Button

xiv. On the response window, you should receive a Status: 200 OK and the Response json